An SPF record let’s mailboxes know via which mail servers your e-mails are sent. It is a kind of recommendation to spam filters to indicate which e-mails are legitimate and which are not.
Because of that recommendation, spam filters immediately notice when spammers send emails on your behalf, because they use other mail servers. These fraudulent e-mails are blocked by the spam filters. Conversely , an SPF record increases the chance that your own e-mails will pass through the spam filter.
An SPF record is linked to your domain name. So you do not need a separate SPF record for every e-mail address (eg jename@company.be), but one for your domain name (eg company.be). All e-mail addresses that are linked to that domain are protected in this way.
How do you add an SPF record?
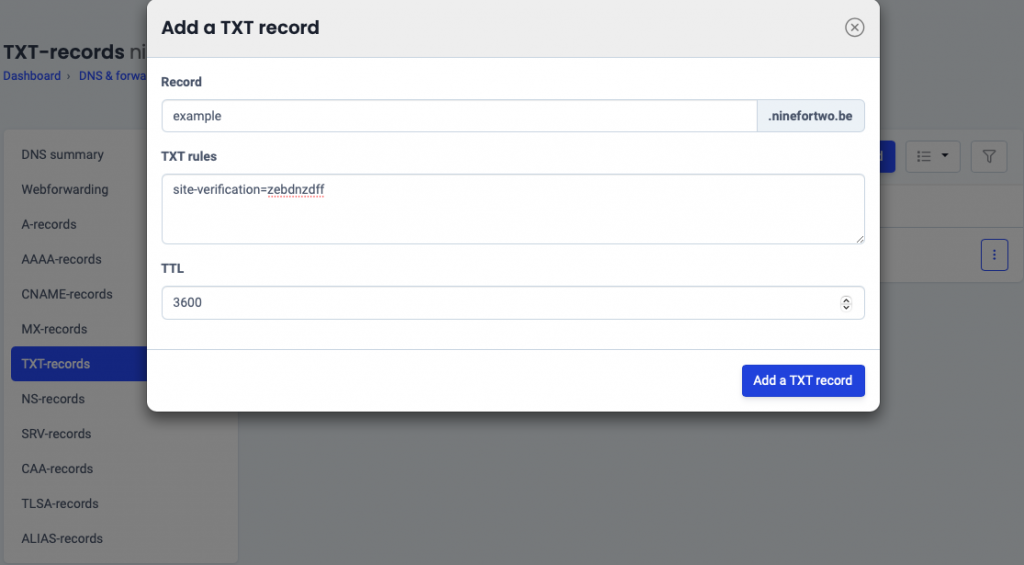
You add an SPF record as a TXT record.
Follow these steps in our control panel:
- Go to “My products”> “DNS & forwarding management”> Click on management next to your domain name.
- Select “TXT records” in the menu on the left.
- Add your SPF record under “TXT rules” (see image). Leave the hostname empty.
See further for the recommended SPF records and how to create an SPF record yourself. - Click on “Add” to confirm.

Recommended SPF records for your Easyhost mailbox
Basic mailbox: v=spf1 include:_spf.relay.mailprotect.be -all
How is an SPF record structured?
v=spf1  include: spf.myhost.net mx ip4: 192.150.1.1 a: mailing.mydomain.net -all
The SPF version - The include statement - additional statements (advanced) - The factor
SPF version : “v=spf1” indicates which version of the SPF standard you use.
include statement : “include: <hostname>” indicates that the servers included in the spf record of <hostname> must be included in this SPF record
SPF or designated host : This is an IP address or a hostname with a standard SPF that you want to use, by accurately displaying one or more automated server (s).
ip4 statement (advanced) : “ip4: <ip address>” indicates that the server with <ip address> may send mail for this domain
a statement (advanced) : “a: <hostname>” indicates that the server may send <hostname> mail for this domain
mx statement (advanced) : the “mx” addition indicates that the servers that handle incoming e-mail traffic for the domain may also send mail in the name of that domain
Factor : This part can be a number of options.
- -all = Hard fail. Any message that does not come from a mail server listed in the SPF record is treated as spam.
- ~all = Soft fail. Any message that does not come from a mail server listed in the SPF record is probably spam.
- ?all = Neutral factor. For messages from a server that was not included in the SPF record, there is no special recommendation regarding the classification of the message.
- +all = No restrictions for this domain
Create an SPF record yourself (advanced)
To create a personalized SPF record, go to an SPF wizard generator. Based on a few questions, this tool generates your SPF record.
Use this information:
- Enter your domain name
- Set “allow servers listed as MX to send e-mail for this domain” to Yes if the server that handles the incoming e-mail traffic from your domain also sends out e-mail itself. If the e-mail traffic through the Basic Email Platform expires choose to No.
- Set “allow current IP address of the domain to send e-mail for this domain” to YES if the web server to which your domain name refers also sends mail. If the contact forms on your site from another SMTP server to use like a Easyhost shared hosting is the case, choose No .
- Set “allow any hostname ending in <your-domainname> to send email for this domain” to No
- Do you use a different SMTP? Enter its IP address in the “IP addresses in CIDR format that deliver or relay e-mail for this domain” field.
- Copy the result and add it via the DNS settings in the control panel (see earlier) .