If a folder is secured, the pages hosted in this folder ask for a password before they are opened.
Follow these steps in the control panel to add a secured folder:
- Go to “My products” > “Web hosting” > Click on the button “Manage hosting” to the right of your domain name for which you want to protect a folder.
- Select “Security” in the menu on the left and then click on the “Secure folders” tab.
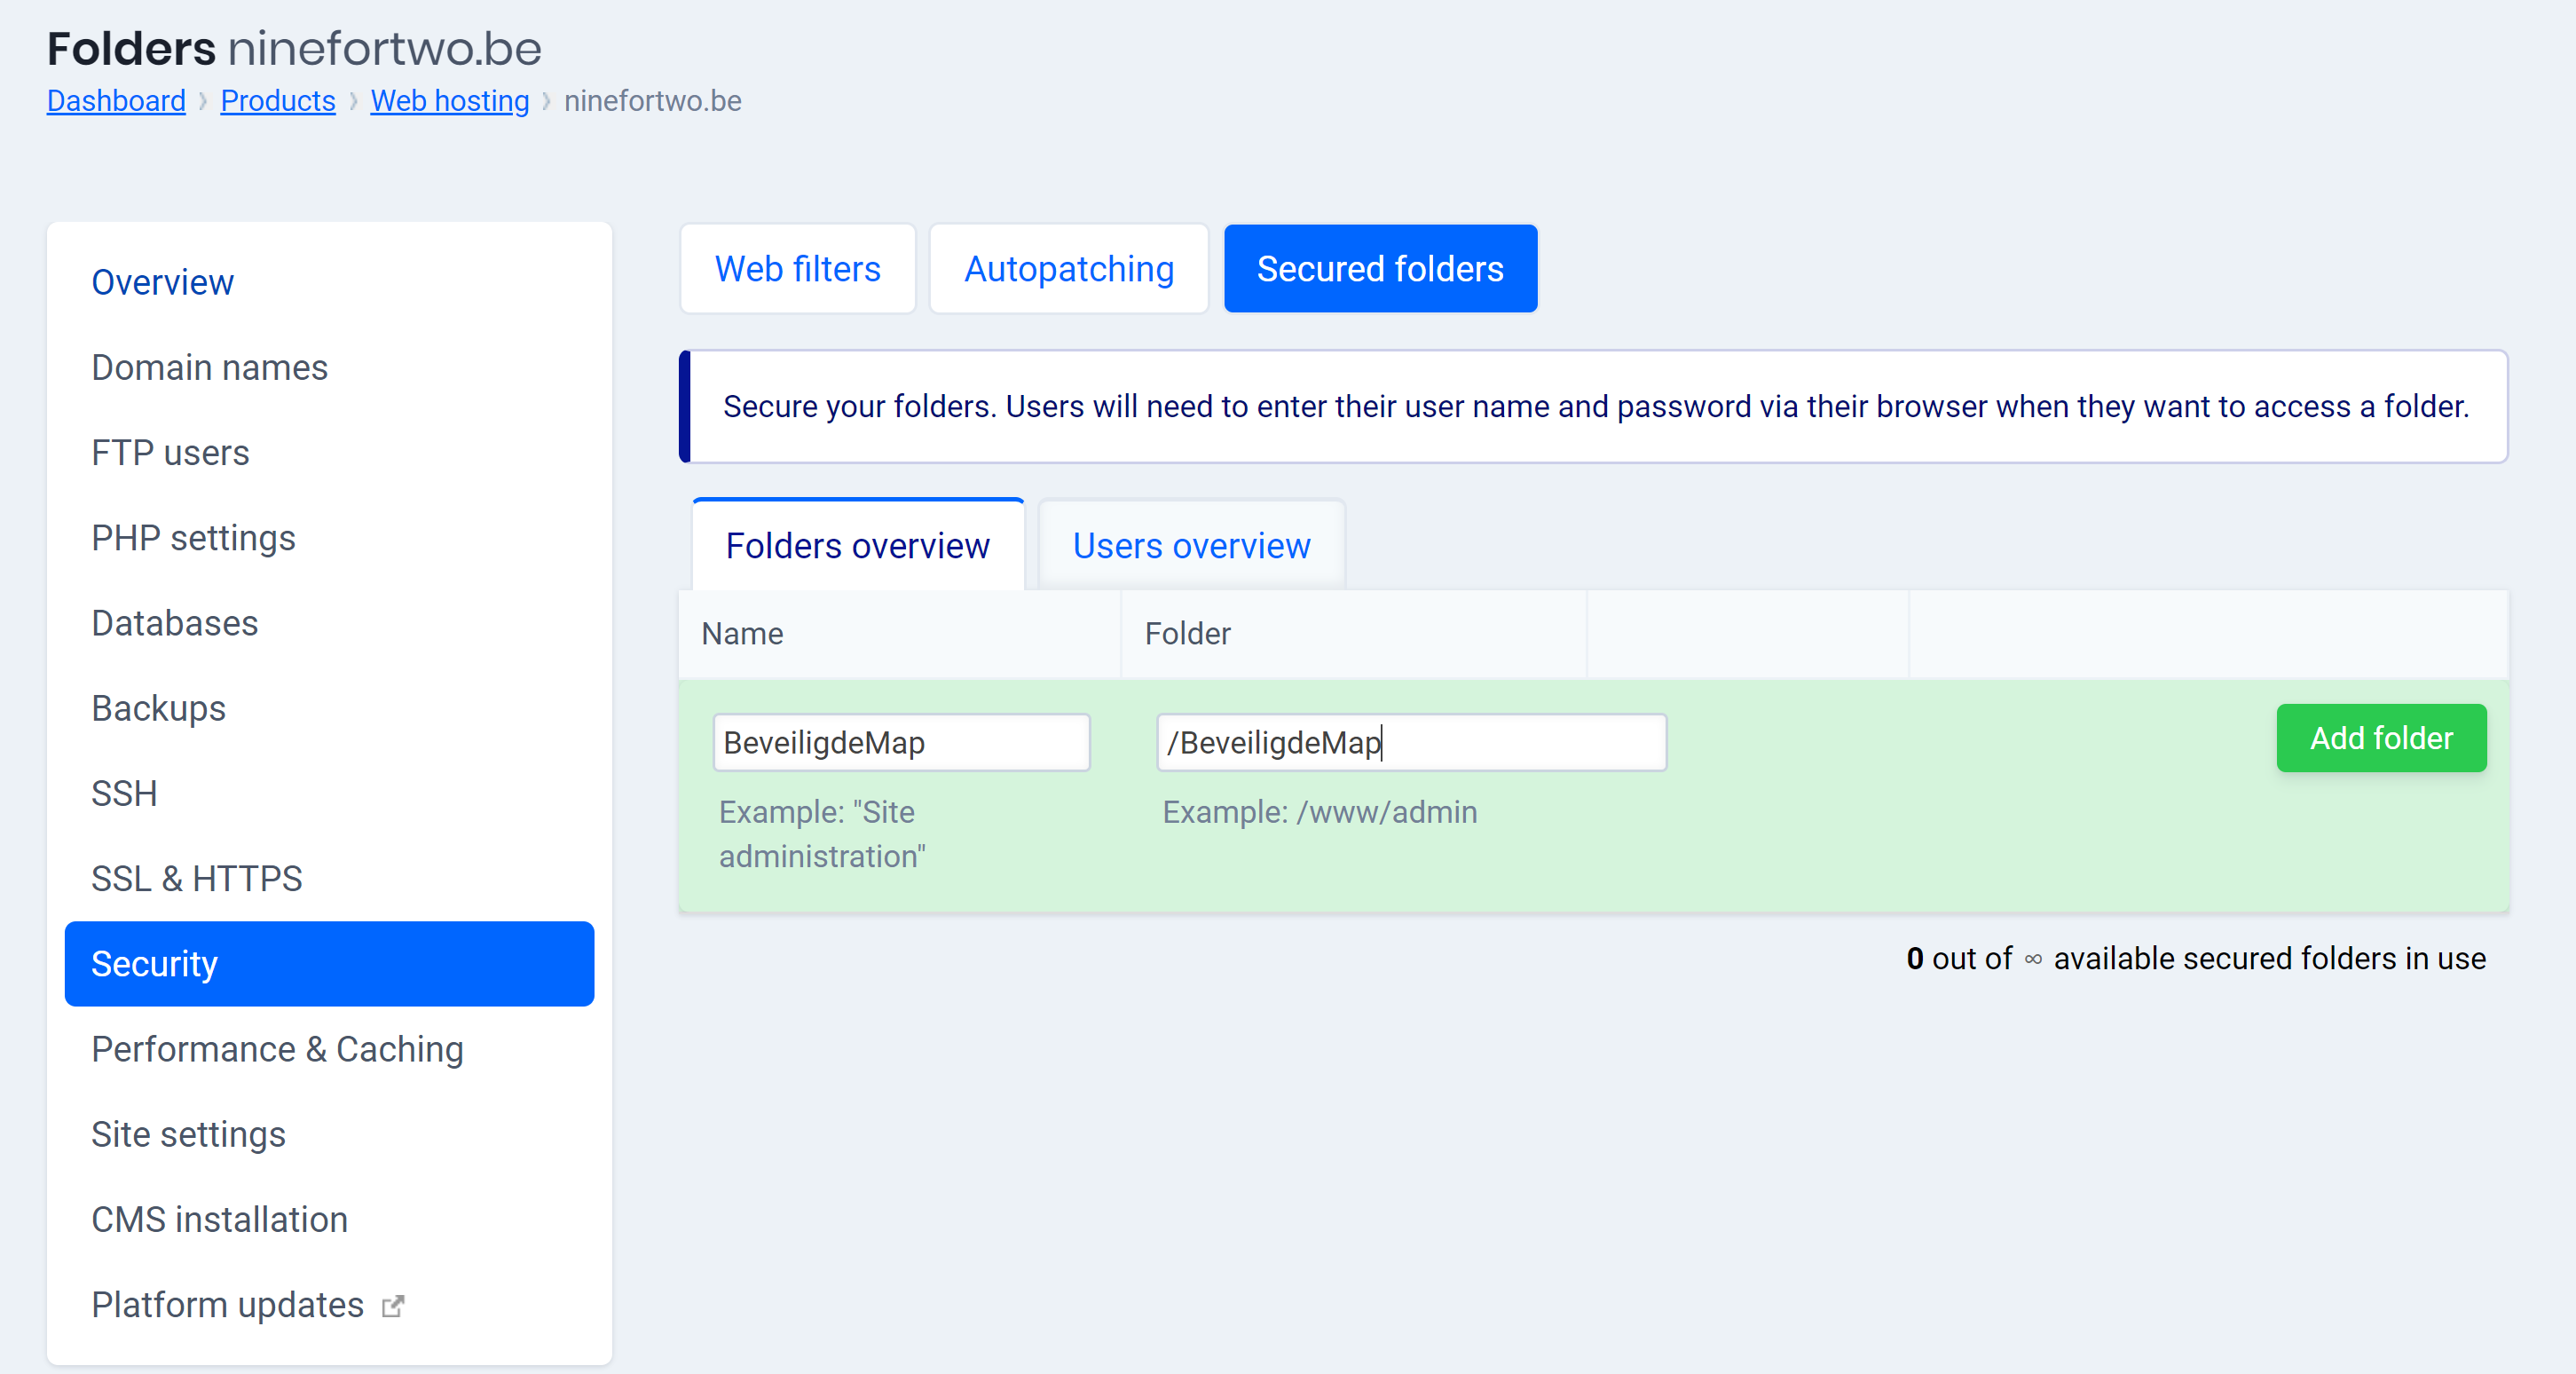
- Give this secure folder a name that is clear to you.
- Enter the path to the folder you want to protect and click on “Add folder” (see image).

- Then go to the “Users overview” tab.
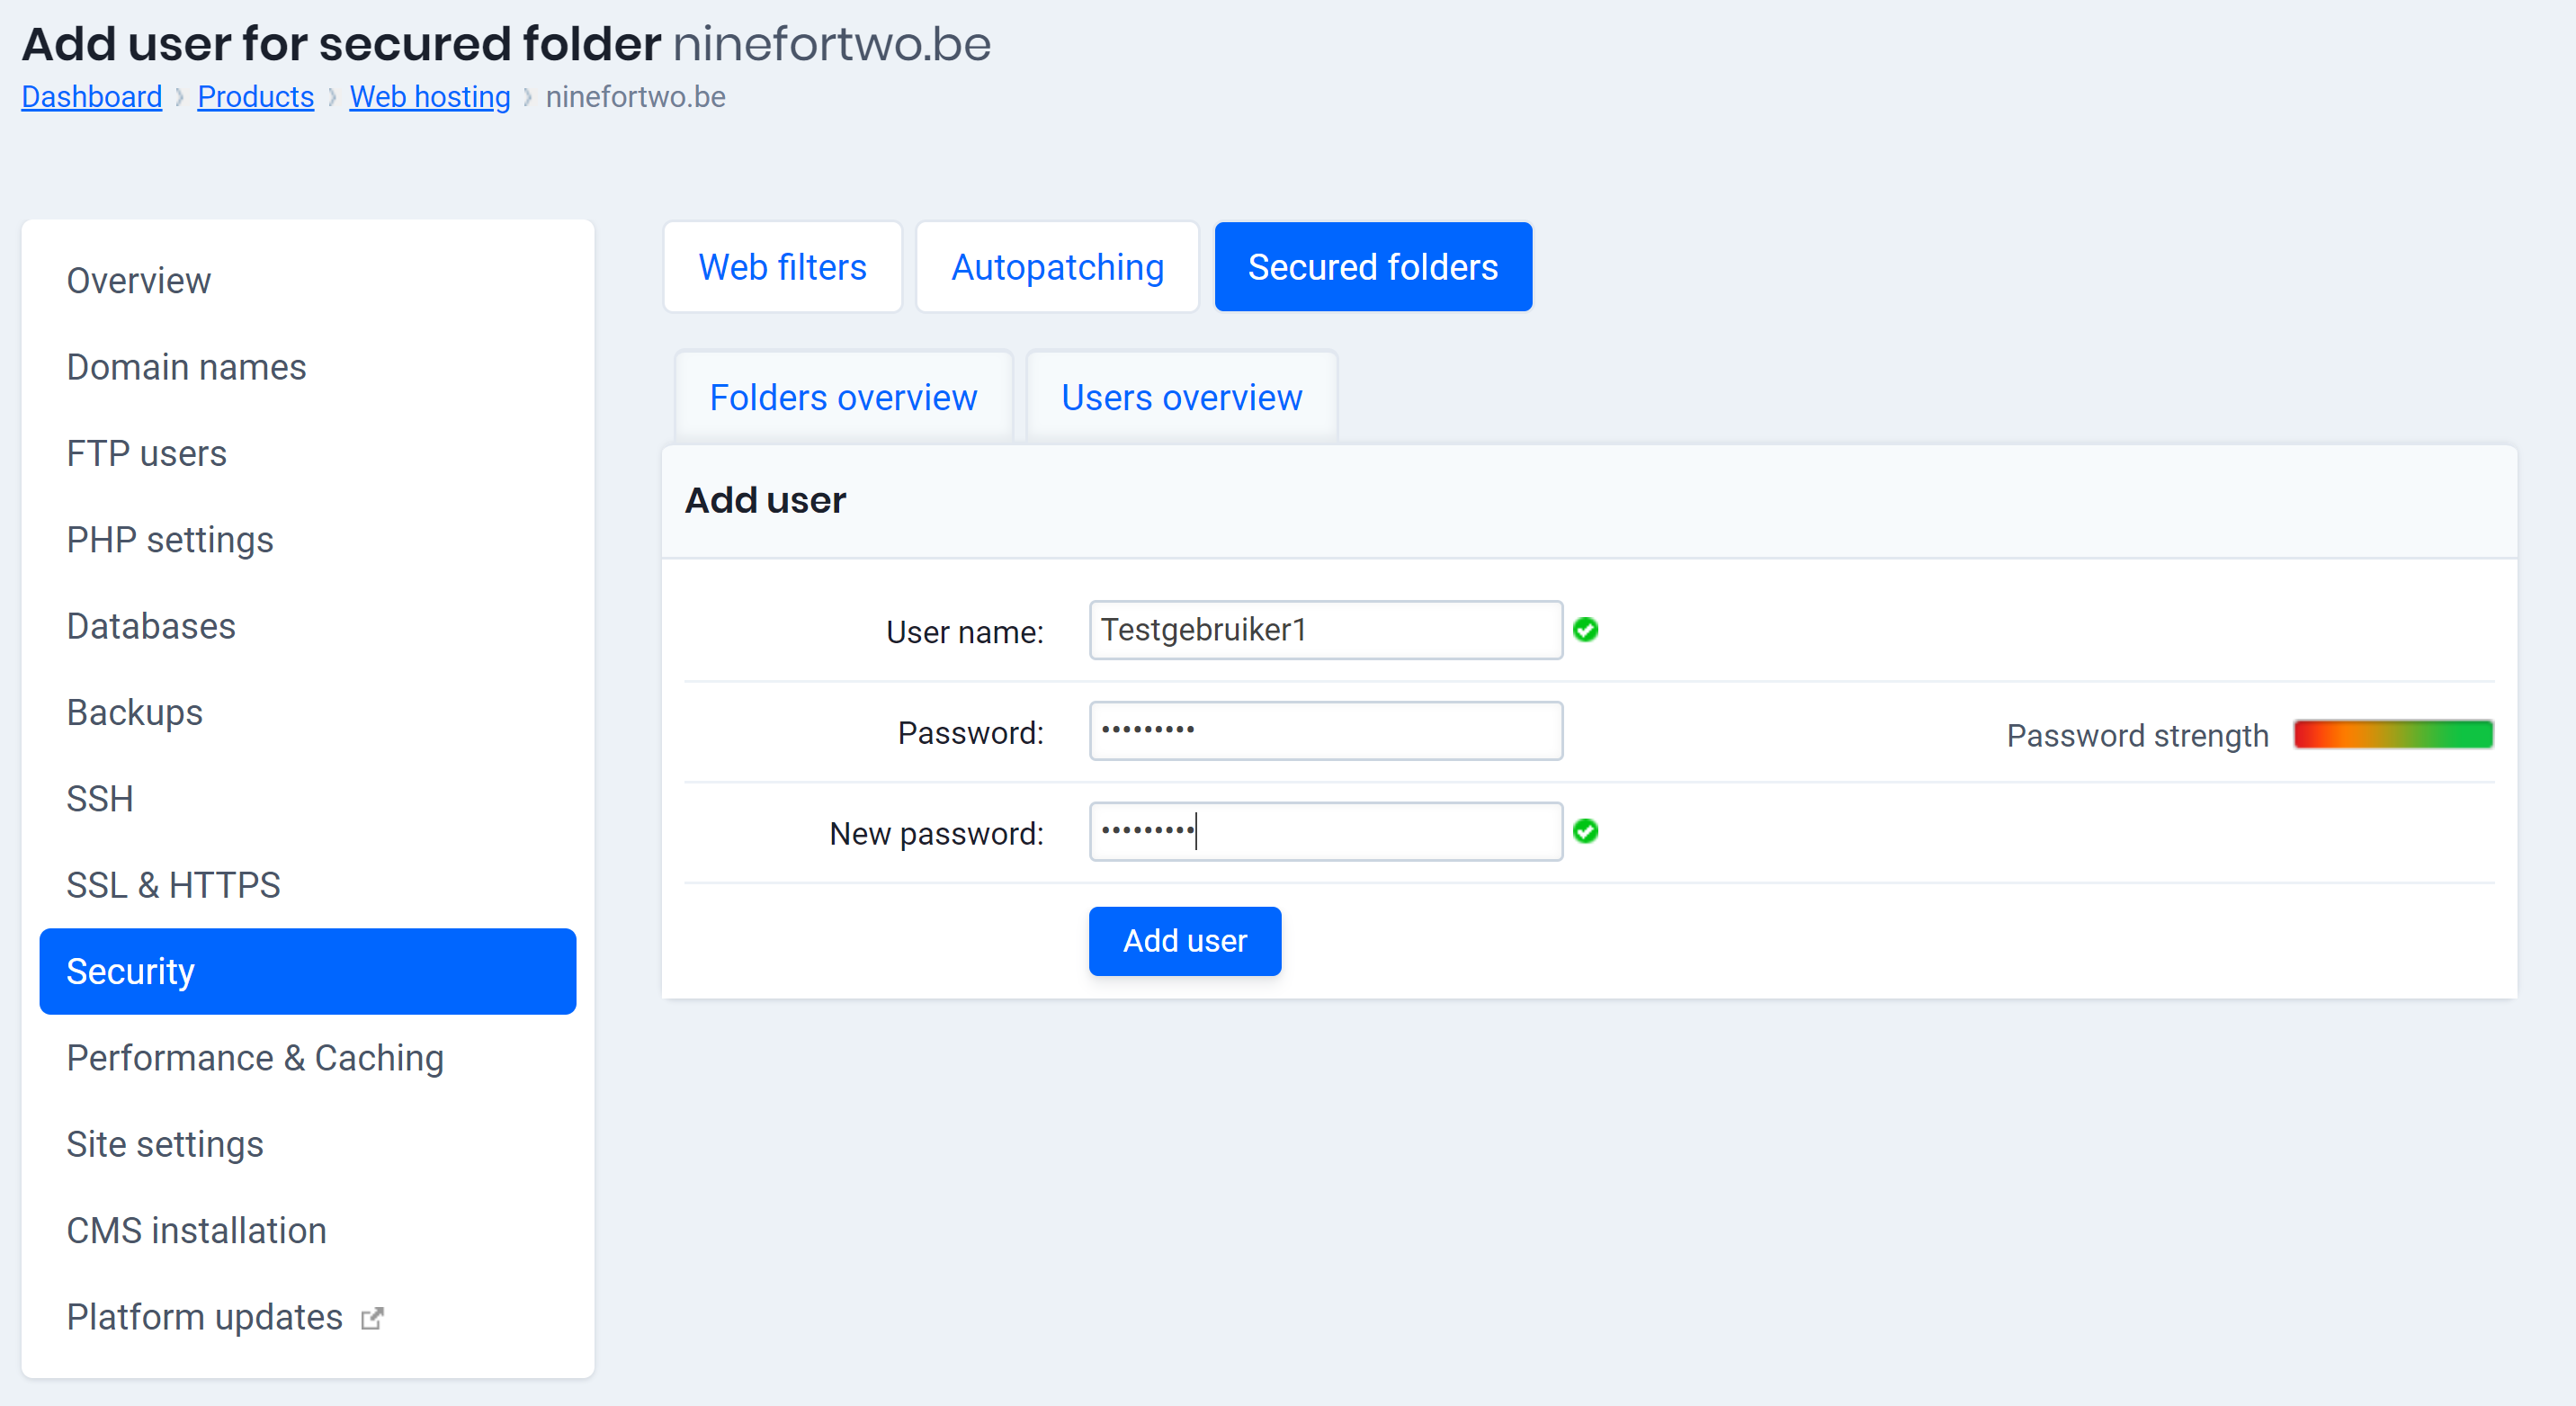
- Click on “Add user”.
- Enter the user’s name and choose a password. Click on “Add user” to confirm this.

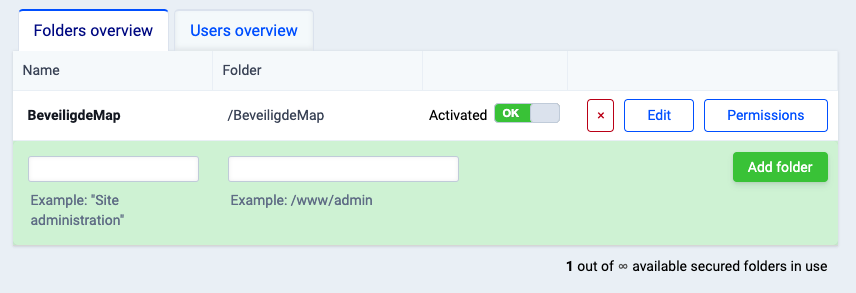
- Go to the “Folders Overview” tab and click on “Permissions” (see image).

- Review the list of users who have access to the secured folder.
