This feature allows you to connect your e-shop with marketing tools such as Google Ads, Facebook Pixel and others. This allows you to monitor the performance and effectiveness of sales and ads in more detail, target them, and better understand your customers. The function is available with the premium Profi package.
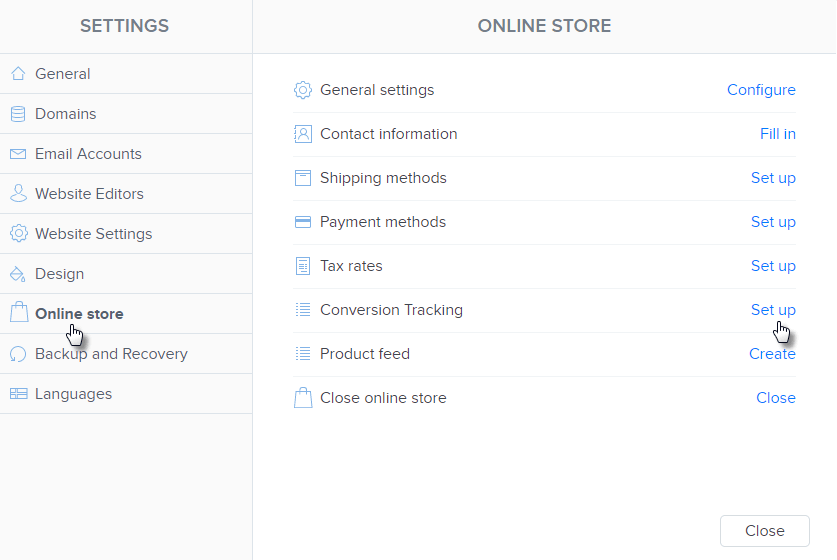
- Log in to your Webnode account and click Settings in the upper menu of the editor.

- In the Online Store tab, click Set up next to Conversion Tracking.

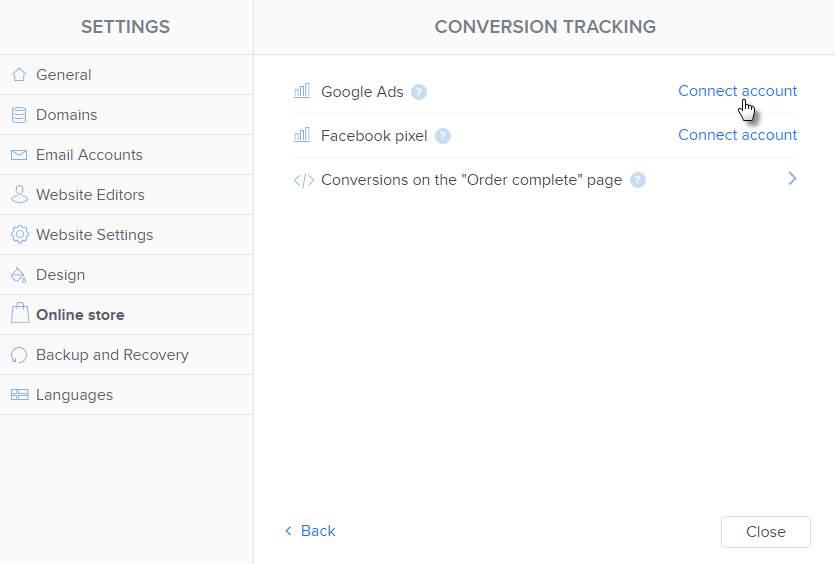
- Click Connect Account for the selected service.

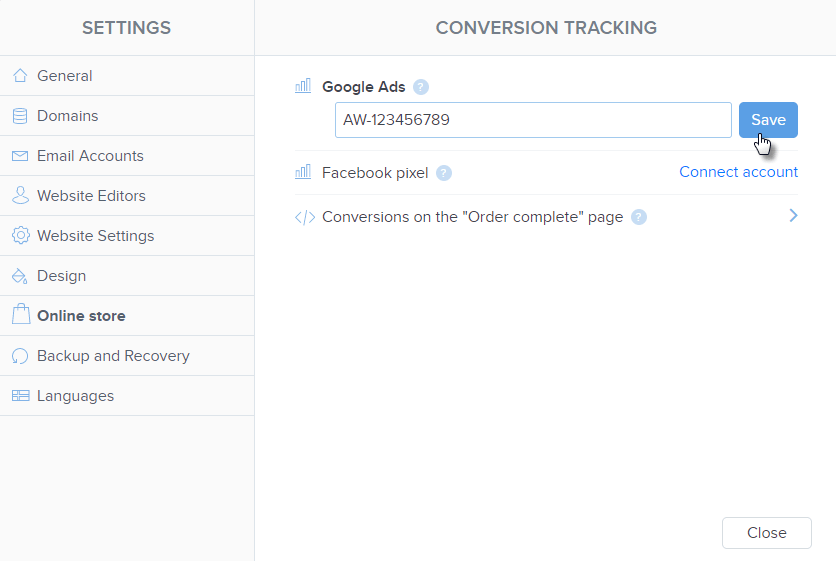
- Enter the tag ID and click Save. Then publish the pages.
For Google Ads and Facebook pixel, enter the tag ID. If it is another service, enter the complete code in the third field Conversion on the “Order complete page“. More details below.
- Google Ads
- Facebook pixel ID
- Other services
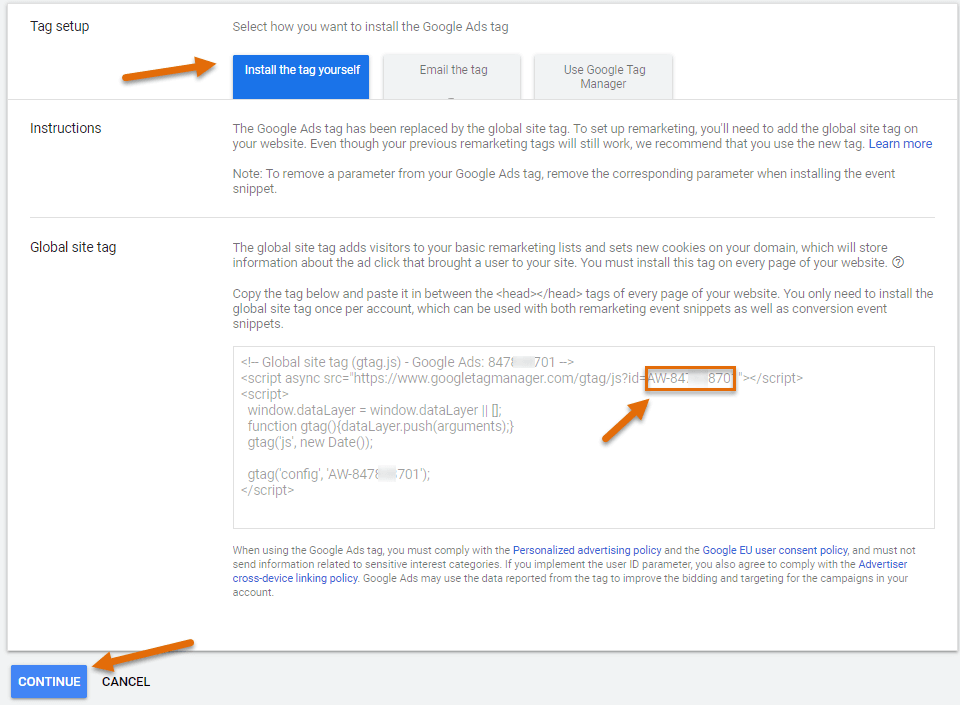
Log in to your Google Ads account. Generate a Google Ads tag or use an already existing one. The ID tag is part of the generated code. The form of the ID is eg. AW-123456789.
Generating a code which includes the tag ID is described here. 
Copy the tag and insert it to the field in your website settings. Save the settings and publish the pages.
Log in to your Business Manager account, which is used to create and manage ads on Facebook.
You don’t need the whole code to connect a pixel to your website, you need only the pixel ID. The ID can be copied while creating a pixel. It is part of the code that will be displayed to you after the pixel is generated. You can find it at the bottom of the code after the “id =” tag.
Once a pixel is created, the pixel ID is also available in the account administration. You can find it in the Events Manager section and then Data Sources. The ID is listed under the name of the created pixel.
Copy the ID and paste it into the FB pixel field in the conversion tracking section in your website settings. Save the change and publish the pages.
If this is a service other than Facebook Pixel or Google Ads, you can use Conversion on the “Order complete page“
Generate a code for the selected service and insert it into the prepared field. For example, you can enter a Google Analytics code in this field to collect detailed information about orders, purchases, and products. Google Analytics must first be linked to the e-shop according to the instructions.
It is necessary to make sure that the code contains the requisites according to the instructions of the given service and is inserted completely. After pasting the code, save the change and publish the page.